
How to add an AI shopping assistant to Shopify that knows your live catalog
Yevhen Kurapov, co-founder · Updated Sep 29, 2026
Connect your store from the ChatPal dashboard with its .myshopify.com address. It searches your catalog when a shopper asks, so prices, stock and variants are current and nothing is synced. Switch on the chat widget in your theme editor, no code. Instagram, WhatsApp and Telegram answer from the same catalog.
If you sell coffee online on your own, most chat questions are about the beans: is the Ethiopian in stock, does the Colombia come in 5 lb, is anything on sale. This guide sets up an assistant that answers those from your live store.
What "knows your live catalog" means
ChatPal keeps no synced copy of your catalog. Each time a shopper asks, it searches your Shopify catalog at that moment, so a bag you marked sold out in Shopify is reported sold out the next time anyone asks.
- Collections answer "what's on sale?" It lists up to 10 products from a collection you've made in Shopify, such as a sale shelf, in the order you arranged them.
- A discount counts only when your store sends the price it was before. A bag at $19 that was $24 is shown as $19, down from $24. A low price, or a collection named "SALE", is not treated as a discount, and a product marked down on only some sizes counts as not discounted, because the store doesn't say which size.
Step 1: connect the store
You need a ChatPal account; signing in with email or Google creates one. In the dashboard, go to Integrations, then Shopify. Type your store's address in the Store address field and click Connect Shopify.
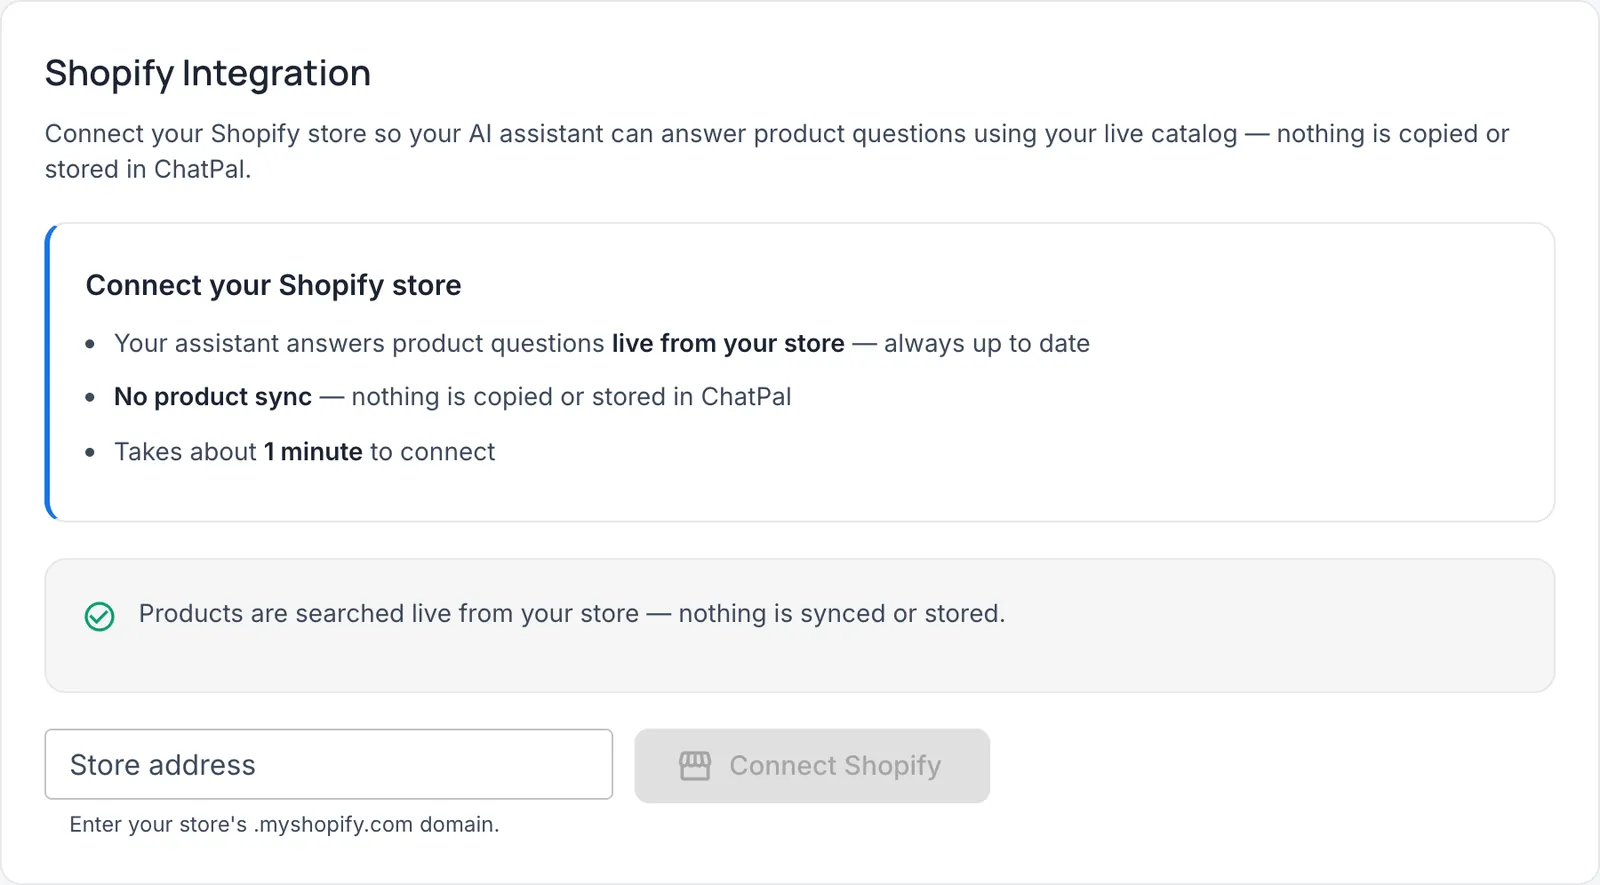
Use your Shopify address, your-store.myshopify.com or the admin.shopify.com/store/your-store address from your admin, not a custom domain like www.yourcoffee.com.
If your assistant already has instructions, a welcome message, a widget title, a subtitle or colors, a Review before we set up step comes next. Each item has a Replace box; anything you leave unticked stays as it is.
Then Shopify shows its approval screen. ChatPal asks only to confirm you own the store and to read its currency; it never changes products, orders or settings. Approve it and you're sent back to ChatPal.
Step 2: check what it set up for you
After you approve, a Setting up your store screen shows three steps: store connected, reading your store's pages, writing your assistant. Continue in background lets you leave while it runs.
While it runs, ChatPal:
- reads your store's own pages (about, FAQ, shipping, returns, contact) and adds them to the assistant's knowledge. Each page counts toward your plan's limit on web pages, the same as a page you add yourself (10 on the free plan, 30 on Starter). If the limit is already full it reads nothing, says so, and leaves the welcome message and instructions for you;
- writes a welcome message, instructions and a widget subtitle from those pages;
- sets the widget's title from your store's name and its colors from a screenshot of your storefront.
It only fills in what you haven't set or ticked Replace on. Read what it wrote and add what only you know, such as your roast days. Edit any of it under Configuration and Widget in the dashboard.
Step 3: turn on the chat widget
The widget is a Shopify app embed, a switch in your theme editor. Once you're connected, the Shopify integration page in ChatPal has an Open theme editor button. It opens your theme editor with the ChatPal widget pre-selected, so usually you only need to click Save. If the switch is off when it opens, do it by hand:
- In your Shopify admin, go to Online Store → Themes.
- Click Edit theme on your current theme (some admins still label it Customize).
- Open the App embeds tab (the puzzle-piece icon) in the left sidebar.
- Switch ChatPal Chat Widget on.
- Click Save. The chat bubble appears on your storefront.
This widget is the only place shoppers can add to the cart from the chat and ask "what's in my cart?". They ask outright, "add the 12 oz whole bean", and if the grind or size isn't settled yet, the assistant asks which one first. It adds 1 to 10 of an item at a time.
Step 4: add the channels your customers write on
If people ask about your beans in DMs, connect those apps to the same assistant from Integrations. It answers from the same live catalog there.
-
Instagram: needs a Business or Creator account (switch a personal one in the Instagram app first) linked to a Facebook Page. Click Connect Instagram, log in and approve the permissions, which let ChatPal read your DMs and reply for you. It then starts handling them.
-
WhatsApp: click Connect and keep the app to go on answering from the WhatsApp Business app on your phone, or Connect via Cloud API to move the number to ChatPal instead. Moving it means the number stops working in the WhatsApp Business app and your team replies from the ChatPal inbox. Either way:
- Sign in with Facebook in the popup that opens.
- Pick an existing Meta Business account or create one in the popup, then do the same for a WhatsApp Business account.
- Choose the phone number. Moving it, you verify it when Facebook prompts; keeping the app, you scan a QR code from that phone's WhatsApp Business app (Settings → Account → Business Platform).
If you keep the app: no official business badge, no WhatsApp for Windows or WearOS, and you must open the app regularly or Meta disconnects the number.
-
Telegram: open Telegram, message @BotFather, send
/newbotand follow its prompts for a name and username. Copy the token it gives you, then click Connect Telegram Bot and paste it.
On all three the assistant reads up to four photos per message (10 MB each) and answers from them with the caption, so a shopper can send a photo of a bag. Voice notes, video and stickers are ignored. None of the three can start a conversation. Instagram doesn't support story mentions, and the assistant can't see which story a reply was to; Telegram works in private chats only.
Step 5: test it with last month's questions
Open Playground in the dashboard. It's the same chat your shoppers get. Each question you send and each Ask again is a real reply that counts toward your monthly messages, so this list costs at least five of the free plan's 100, and more if you use Ask again or Copilot.
Ask last month's real questions, in the shoppers' words:
- one about a product that sold out yesterday. It should say it's out of stock;
- "is the Colombia in 5 lb?";
- "what's on sale?". It should list your sale collection, or say you don't have one;
- a shipping or returns question. It should answer from your shipping page, not invent a cost or date;
- a question about something you don't sell, which it should say you don't carry.
When an answer is wrong, click Why this answer? under it to see which products and pages it used. Copilot, ChatPal's built-in assistant, then asks whether the answer was right. Tell it what it should have said and it suggests fixes: an edit to the instructions, a page to update, or, when the wrong fact comes from your store, where to correct it there. Nothing changes until you approve it. Click Ask again to check it worked.
Add to cart works only on your live store, so test it there after Step 3.
If shoppers ask where their order is, you can also turn on Order support on the Shopify integration page. The customer signs in with their own store account, and requests to cancel or change a delivery come to you. It needs Shopify's new customer accounts, and the page tells you if your store still uses the classic ones. Order support isn't available if you handle chats through Zendesk.
Our test store sells snowboards, not coffee, so here is what an answer looks like there.
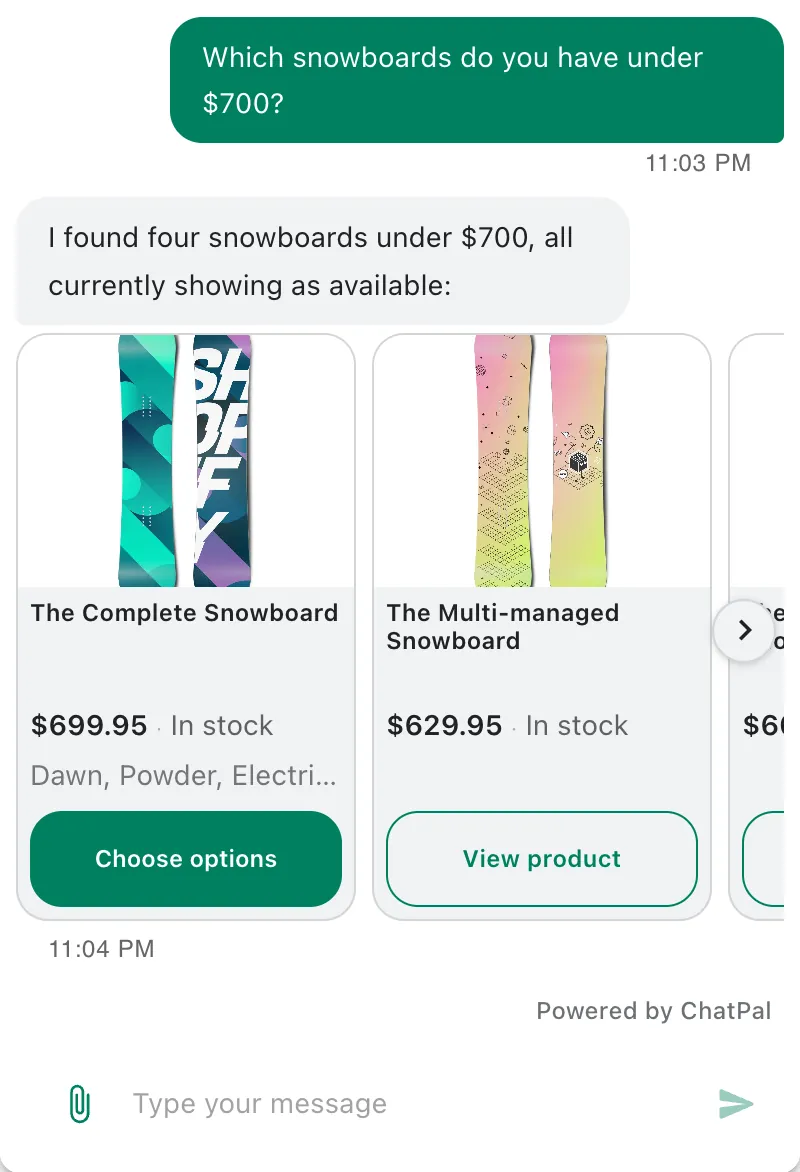
See also how ChatPal works with Shopify, how it compares with other Shopify chatbots and plans and message limits.
If shoppers often ask where their order is, this guide shows how to set up order support.